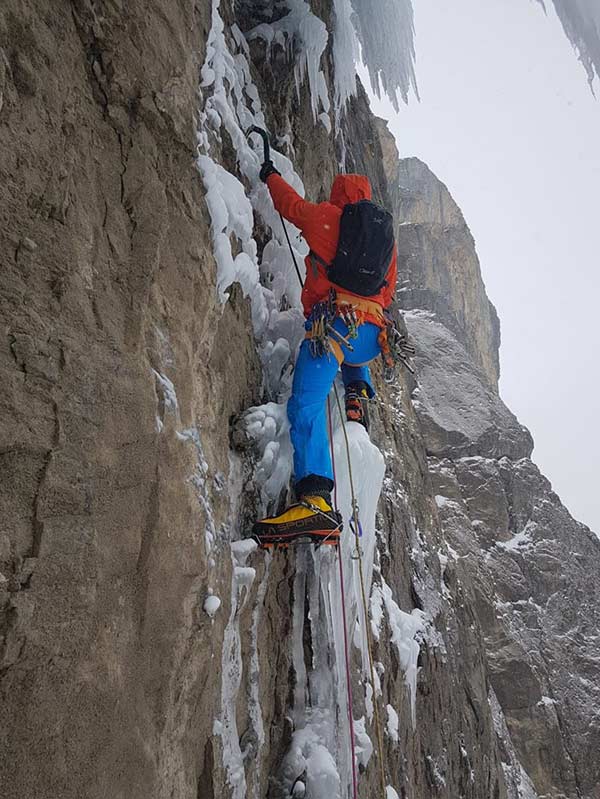
When climbing ice falls you have the freedom and privilege to choose your own climbing line and belay it as you see fit. For the latter, ice screws play a central role. In this article, the ice climber, mountain guide and author Peter von Känel explains what is important when securing with ice screws.
A post by Peter von Kaenel – presented by Petzl, Bächli Bergsport and the Adelboden Kandersteg Alpine School
You will learn that in this article
- Basics: Setting and removing ice screws
- Solid vs unreliable ice screws
- When and where to place an ice screw
- The step to lead | Ice and mixed climbing courses
- Tips and Tricks
- Video instructions: sharpen ice screws yourself
set ice screws | basics
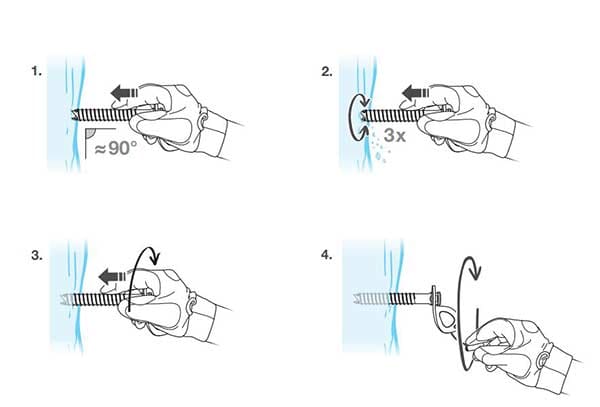
- Ice screws are placed approximately perpendicular to the ice surface.
- Hold the ice screw firmly in your hand, press it firmly against the surface of the ice between hip and chest height and apply it with a twisting motion with your wrist. If necessary, first drill a small depression with the ice screw by means of a repeated rotational movement.
- Now comes the tricky part, which needs some practice: While still pressing the ice screw against the ice surface with the palm of your hand, turn the ice screw one full turn into the ice several times.
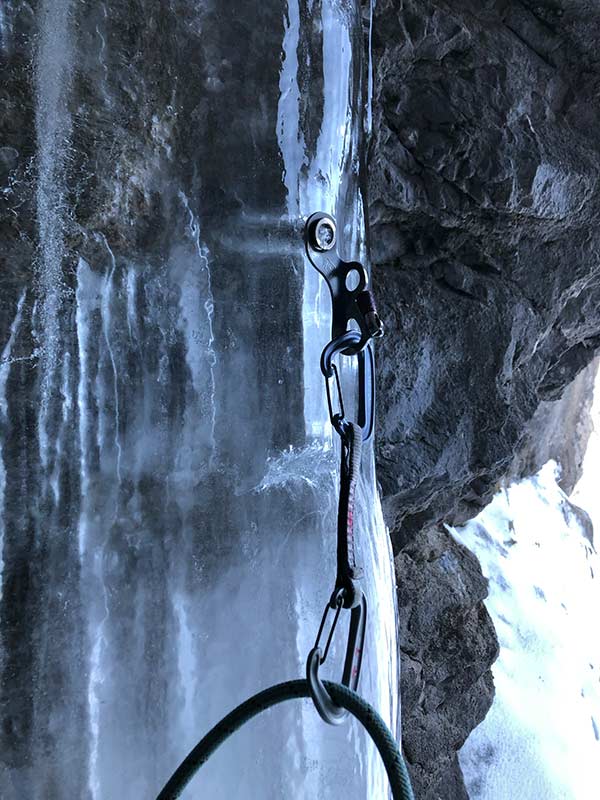
- As soon as the ice screw is a few turns deep in the ice, you fold out the crank and turn it in until the tab is pointing downwards and the ice screw protrudes about 0.5-1 cm out of the ice. Reason. When unscrewing the ice screw later, you can loosen the frozen drill core from the inside of the ice screw by first screwing it in a little. The last step is to fold the crank back in and clip the quickdraw into the loop.
«It is not always possible to fully screw in an ice screw. In this case you look for thicker ice or use a shorter ice screw.”
Peter von Kaenel
Remove ice screws
The resting position of the standard movement (triangle) also proves itself for unscrewing the ice screws. The drill core is tapped out immediately after turning it out. To do this, take hold of the ice screw by the thread and tap the tab against the head of the pick or against the ice.
"If you tap the thread against the pick, you get the core out, but you damage the surface of the ice screw, which is important for screwing in."
Peter von Kaenel
How long does an ice screw last?
The impact force that acts on an ice screw in a lead climb primarily depends on the fall factor, the weight of the climber and the stretch of the rope. In the following, unfavorable scenario, an impact force of 6 kN was measured (corresponds to approx. 600 kg): Static fall 1.5 m above the first quickdraw, which is 1.5 m above the stand. Single rope, weight = 80 kg.
A correctly set ice screw with a length of at least 13 cm in solid, compact ice has a holding force of more than 10 kN (corresponds to approx. 1000 kg). In some cases even more than 20 kN were measured during pull-out attempts.
«Rule of thumb: If the ice screw bites at least ¾ of its thread length, it has sufficient holding power to arrest a fall. However, if it idles more than ¼ of its thread length, it is considered unreliable.”
Peter von Kaenel
Sometimes, while setting an ice screw, you can feel that it is spinning briefly in emptiness due to air pockets in the ice. A large scatter of the holding forces was measured in ice with such noticeable air inclusions by means of pull-out tests.
Laser speed light Petzl ice screws
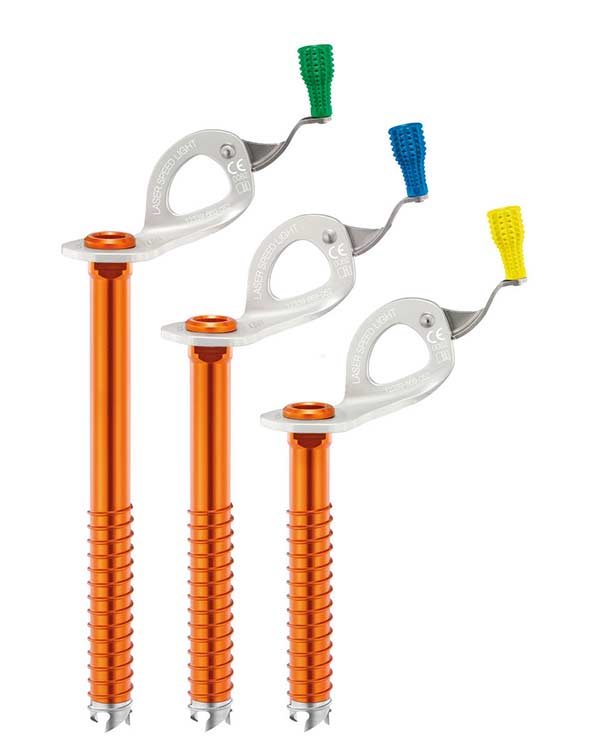
The Laser Speed Light is one of the most proven, lightweight ice screws. The aluminum shaft and steel drill bit reduce the weight of the ice screw.
The integrated foldable crank ensures optimum efficiency, facilitating and accelerating turning. The compact tab makes it easy to twist into cauliflower ice cream.
The optimized shape of the drill bit made of steel with its three teeth ensures quick gripping in the ice. The patented grinding reserve of the teeth also simplifies regrinding.
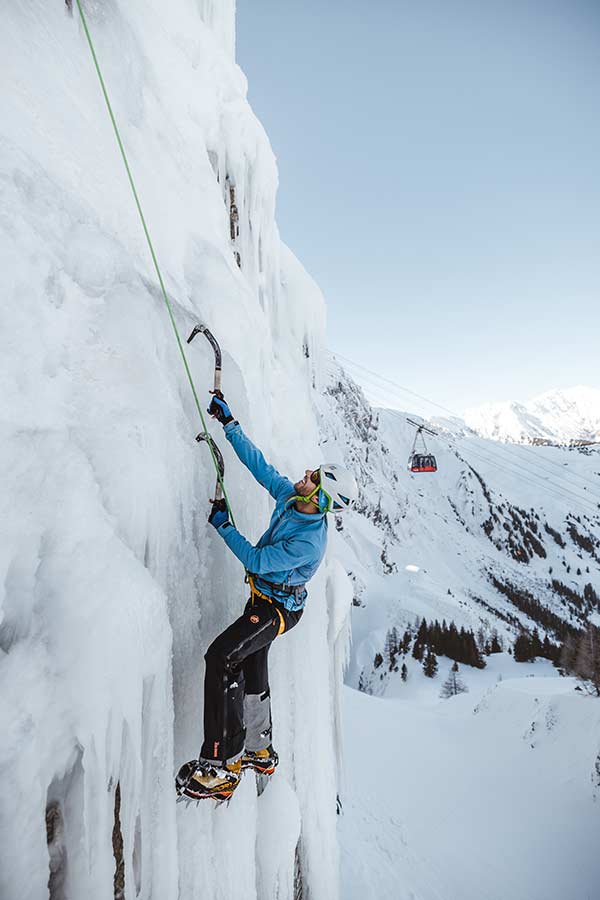
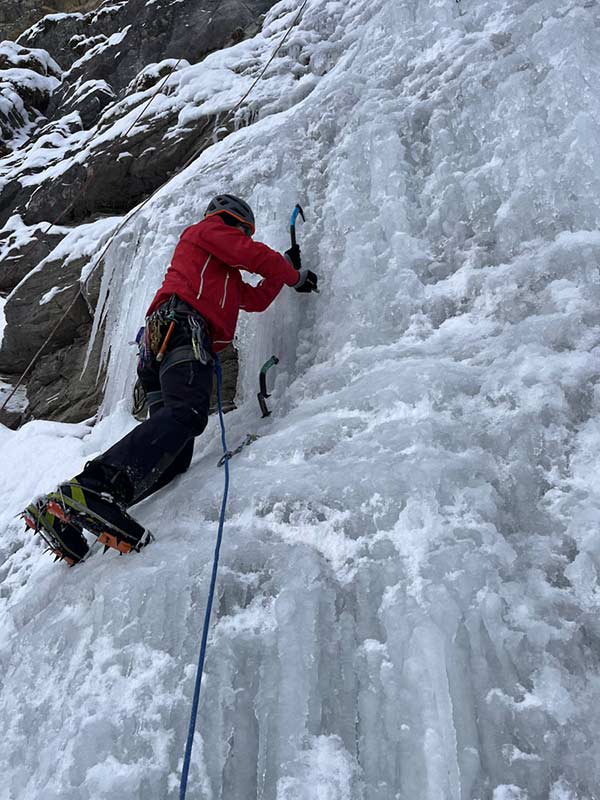
When and where do you put an ice screw?
In general, it makes sense to set ice screws at short intervals. In addition to the main advantage of the lower risk of injury in the event of a fall, you become a little bit more experienced with every ice screw you set.
The first ice screw is usually set with a lateral offset 1-2 meters after climbing off the belay. This is to avoid falling directly onto the belay and/or onto the belayer.
Chimney-like structures are often found in steep climbs, which allow relaxed and safe setting of ice screws.
When crossing, the ice screws are placed in such a way that the person climbing behind does not make a big commute. Immediately before exiting into a flatter zone with snow or porous ice, you set another ice screw into the compact ice from the last good position.
"Ice screws in falling trunnions or pillar pieces are potentially deadly."
Peter von Kaenel
The setting of ice screws in filigree columns and freely hanging cones should therefore be avoided as far as possible. If a large spigot has recently broken off, it is sometimes justifiable to screw into the stump.
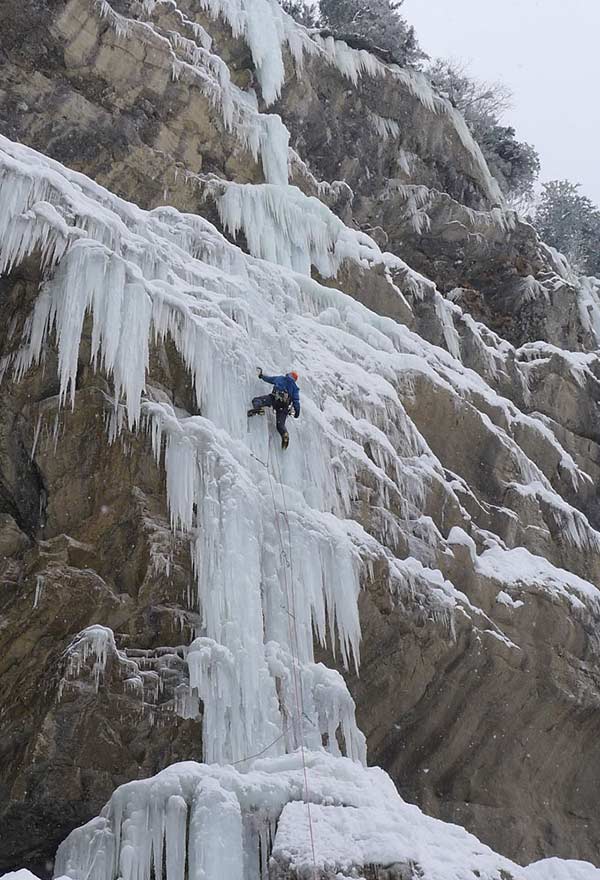
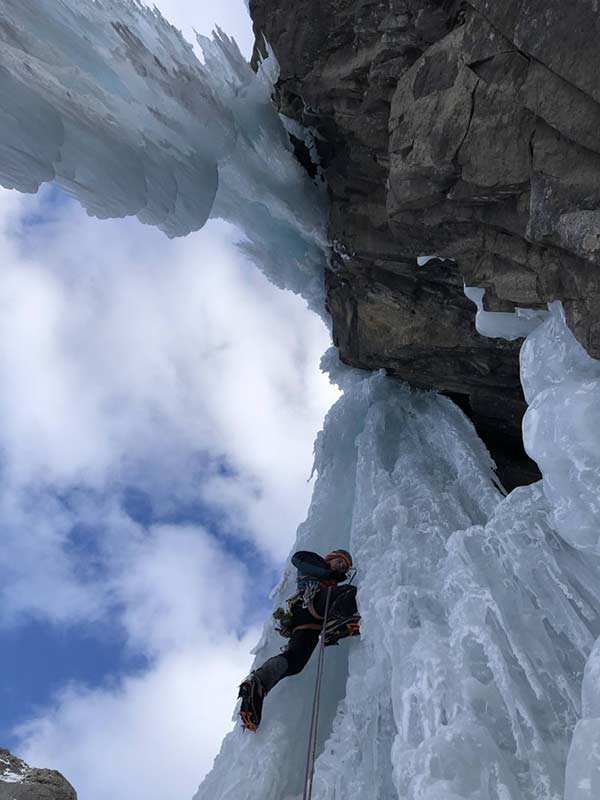
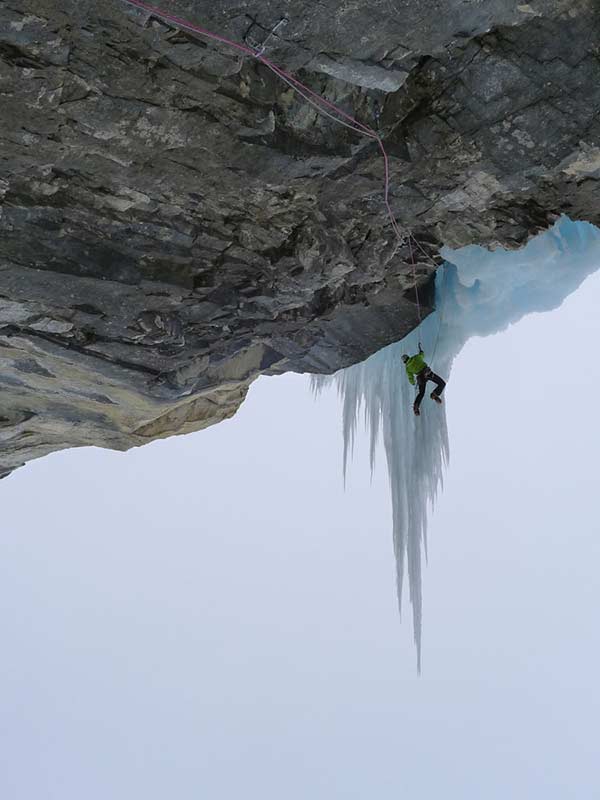
Setting ice screws - different scenarios

The climber would have the opportunity to place an ice screw in the stump on the right. Climbing a giant icicle with a belay on the rock (Flying Circus). The giant icicle has hung off. The climber's position for setting an ice screw is good (Flying Circus). 
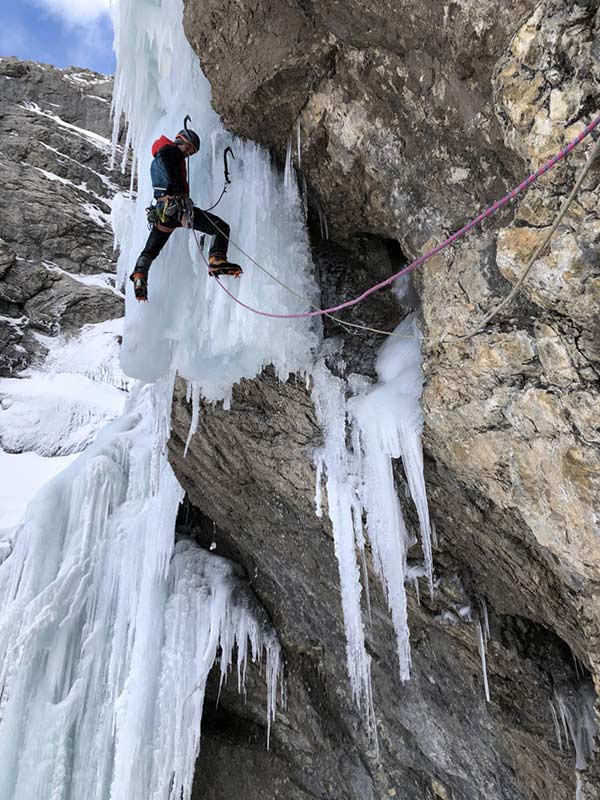
Ice mushrooms that are well connected to the rock are suitable for setting ice screws. The ice screw must be razor-sharp so that an ice mushroom does not burst. Ice screw in an ice mushroom (crack baby). Photo: Cédric de Bourgknecht 
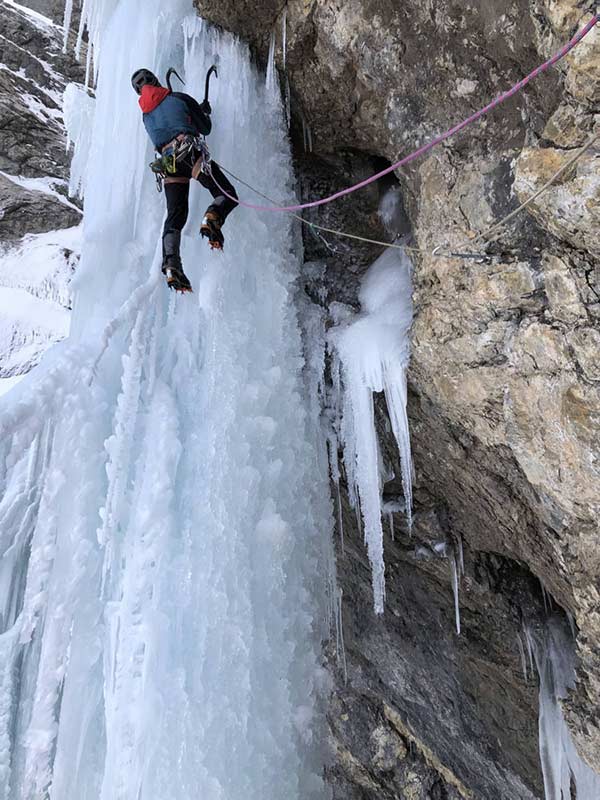
In demanding mixed terrain, you should always have a few short, razor-sharp ice screws with you (outer Fisistock north intersection). Photo: Silvan Schuepbach In compact, well-connected ice, short ice screws are also reliable.

Ice and mixed climbing courses with the Adelboden Kandersteg Alpine School
Would you like to venture into the ice or deepen your existing skills? Whether you are a beginner or an advanced climber, ice or mixed climbing or even on warm winter days with little ice - on the Engstligenalp in Adelboden we can offer you a guarantee that the courses will be held in practically all conditions.
The ice arena is maintained by the Adelboden Kandersteg Alpine School and our team includes experienced and highly qualified mountain guides who will get you fit on ice and mixed terrain.
Put the knowledge you have acquired from «STEEP FROZEN» into practice with us - we look forward to seeing you!
The step to lead
In order to practice lead climbing and setting/removing ice screws intensively and in a safe environment, the following has proven its worth:
- Person A steps forward and deploys three ice screws, with the next ice screw being deployed when the last ice screw is at about knee height. At the last ice screw she abseils down and unties herself.
- Person B now climbs top rope to the last ice screw. Now she steps forward, sets three ice screws for her part, lets herself be abseiled and unties herself.
- Person A now climbs top-rope, removes the three lower ice screws and places them above the last ice screw in the lead climb, abseils.
- Now it's person B's turn to climb again. Etc.
The method is particularly suitable for getting used to lead ice climbing. In contrast to sport climbing, the risk of injury from a fall when leading the ice climb should not be underestimated. It is therefore important to ensure that you always move within your own comfort zone when leading the climb.
"One-handed setting of ice screws with both the left and the right hand should be practiced extensively."
Peter von Kaenel
Tips and Tricks
- The number of existing ice screws should be divided up to the next stand. Depending on the situation, you still have to keep two ice screws in reserve for the stand construction. If the ice screws don't reach the next belay, hang onto the last ice screw (solid ice), rappel down a bit and collect a few ice screws from the lower part of the rope length. You leave the top three ice screws.
- Setting an ice screw takes a lot of strength on steep ice, especially if you haven't quite mastered it yet. If in doubt, it makes sense to hammer in an ice ax very solidly and to carefully fix yourself on it, for example with a sling. So you can put on the climbing harness, rest and set the ice screw in peace.
- In general, when ice and mixed climbing, you should get used to carrying out all manipulations with the gloves if possible, because every time you take a glove off and put it on, it gets a little wetter on the inside.
- Blunt ice screws can only be screwed in with great difficulty or not at all and thus have a negative impact on safety. In contrast, sharp ice screws are easy to position and screw in. In brittle ice, sharp ice screws are less likely to splinter and burst, which has a positive effect on holding power. It is therefore important to always keep the ice screws sharp. You can either have your ice screws resharpened in various mountaineering shops, or you can sharpen them yourself. We show you how to do this in the following video.
Video: Sharpen your own ice screws – this is how it works
To the author
Peter von Känel, born in 1973, is a mountain guide, aviation engineer and passionate climber. For many years, Peter has been intensively involved not only with ice and mixed climbing, but also with the human factor.
In addition to some sensational ice and mixed first ascents such as the BASE route in the Lauterbrunnen Valley, Peter has repeated many extremely demanding routes, sometimes as a mountain guide.
With these tours, as well as in many discussions with experienced climbing colleagues, Peter has acquired a wealth of knowledge about ice and mixed climbing over the years. He passes on this knowledge in courses, coaching and with his new textbook.

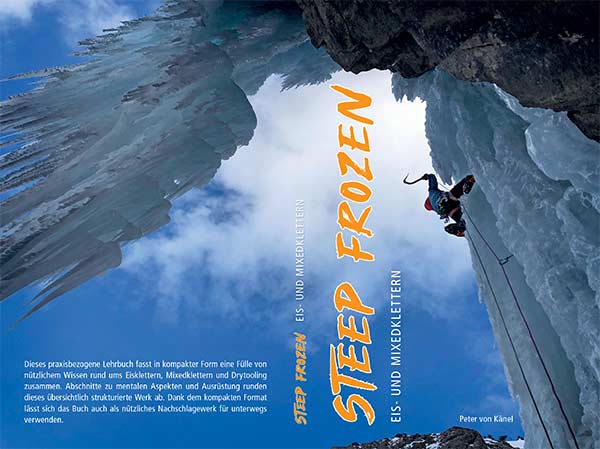
Steep Frozen: A Practical Textbook
This ice cream series only scratches the surface of this fascinating topic. For all those who want to know more about it, the beginning of November 2022 is the book Steep Frozen appeared.
This practical textbook by Peter von Känel summarizes a wealth of useful knowledge about ice climbing, mixed climbing and dry tooling in a compact form.
Sections on mental aspects and equipment complete this clearly structured work. Thanks to its compact format, the book can also be used as a useful reference book for on the go.
The book is in Filidor publishing house published and costs CHF 32.00. You can find more information, including extracts and reader feedback, at Peter von Känel's Website.
That might interest you
Do you like our climbing magazine? When we launched LACRUX, we decided not to introduce a payment barrier. It will stay that way, because we want to provide as many like-minded people with news from the climbing scene.
In order to be more independent of advertising revenue in the future and to provide you with even more and better content, we need your support.
Therefore: Help and support our magazine with a small contribution. Naturally you benefit multiple times. How? You will find out here.
+ + +
Credits: Cover image Petzl | Marc Daviet, article images Peter von Känel